Creating Oracle P6 Primavera Stand-Alone SQLite Database
In our June newsletter, we look at creating the Oracle P6 Stand-Alone SQLite Database.
P6 Professional provides the user with a seamless process to create a Stand-Alone SQLite database. The option permits the user to create multiple instances of a standalone database in different file locations.
This feature enables you to easily establish P6 environments with or without the Oracle Sample data. The feature is also combined with the Check In and Check Out feature as an option to create an SQLite database to check the project out to.
When you import an P6 XER or XML schedule into your new SQLite, only data from the host database will be the data you have used in the imported file. Also consider that if you create a stand-alone database with sample data, some attributes of the database will attach to the XER when you export the file.
Creating Oracle P6 Primavera Stand-Alone SQLite Database
Follow these steps to create the SQLite Database on your computer. Please note, the visual style will change between versions, but the general content remains the same
Step 1:
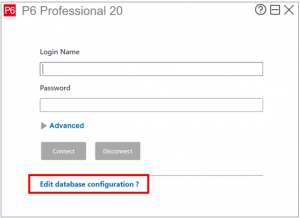
Open the P6 application. In the Login to P6 Professional screen, click on Edit database configuration (or Database in previous versions).
Step 2:
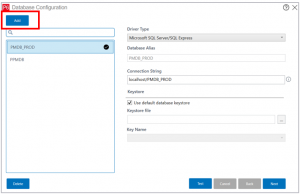
In the Database List page, click the Add button.
Step 3:
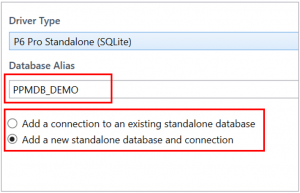
Click on the Driver Type drop down and select P6 Pro Standalone (SQLite).

Step 4:
Type a Database Alias. It’s a good idea to make this meaningful as you may have multiple databases.
Step 5:
If you’re connecting to an SQLite database that already exists, select the existing database option.
However, if you’re creating a new database, select the new standalone database and connection option.
Click Next.
Step 6:
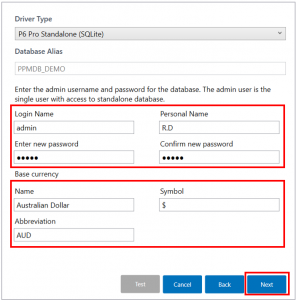
The default Login Name is ‘admin’. Type a password and remember to record it somewhere safe, in case you forget. Confirm the password.
The default currency name and abbreviation are set to USD, but feel free to change as required.
Click Next.
Step 7:
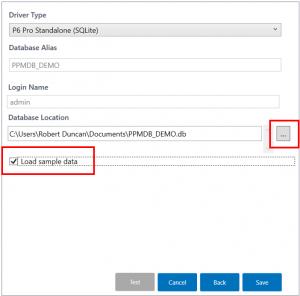
Decide if you require the Oracle Sample Data loaded – tick or untick the box as required. This will load generic data that can be used for internal learning or experimentation.
Step 8:
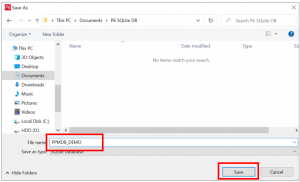
Navigate to the file location to create the Database and name the file. Click Save.
Step 9:
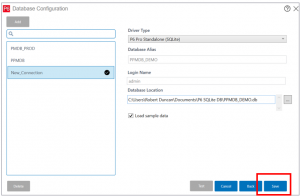
The file name is now displaying where and what the file will be named. Click Save. The application will tell you that the alias was saved successfully. In other versions, you will need to click Next instead.
Step 10:
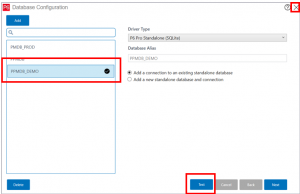
The new database is now displayed in the database list. Select it and click Test to see if the connection is successful. This might not be applicable for other versions.
Step 11:
Exit out of the database configuration tab and go back to the login page.
Step 12:
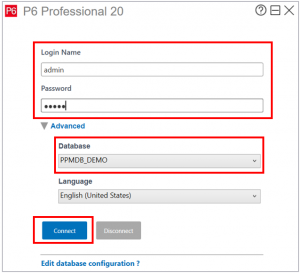
Open the Advanced drop-down (if required) and select the newly created database. Input your Login Name and Password.
Step 13:
Click Connect.
Step 14:
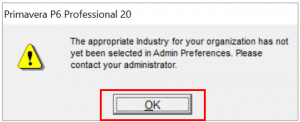
A warning appears and lets you know that the appropriate industry type needs to be set. In network systems, this is done by the P6 Administrator.
You will need to set the industry type to remove this warning. Click OK.
You have logged in to P6!
Step 15:
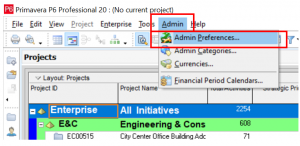
To set the Industry Type, in the main file menu click on Admin, then select Admin Preferences.
Step 16:
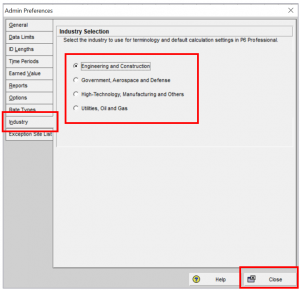
In the Admin Preferences pop up window select the Industry tab and set the required Industry. In this case we have set Engineering and Construction. Afterwards, click Close.
Step 17:
A warning will appear – read and click OK.
Your new database is now ready to use!
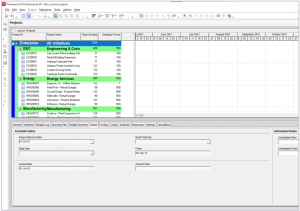
In this blog we demonstrated how to create an Oracle P6 Primavera Stand-Alone SQLite Database.
If you would like to know more about any aspects of Oracle Primavera P6 or using any of Oracle’s Primavera products to better support your project management capability, please contact us.
Prescience Technology is the premier Oracle consulting firm in Australia. Get in touch to find out how we can help boost your project management capability with our technology, training and project resourcing solutions.
Next Month’s Topic
Join us next month, when we will discuss the Check Out and Check In feature with SQLite and XML.


